-
[A-Z]스프링 시큐리티 - 2. 적용해보자 (기본)Back-end/Spring Security 2020. 8. 30. 13:19
- 스프링 프레임워크 기반으로 설명합니다.
- Maven을 이용합니다.
XML 기반이 아닌 JAVA 설정을 기반으로 설명합니다.
스프링 시큐리티를 처음 접하는 개발자들을 위한 게시물입니다.
자바를 기반으로 설정하기 때문에 web.xml을 이용하지 않고 WebApplicationInitializer를 이용합니다.
이전에 작성한 게시물을 참고해주세요. (https://jutabi.tistory.com/88?category=868053)
WebApplicationInitializer를 이용해서 Web.xml을 대체했다면 이제 스프링 시큐리티를 프로젝트에 적용시켜봅시다.
1. Maven 에 스프링 시큐리티를 포함시켜줍시다.
<dependency>
    <groupId>org.springframework.security</groupId>
    <artifactId>spring-security-web</artifactId>
    <version>5.*.*.RELEASE</version>
</dependency>
<dependency>
    <groupId>org.springframework.security</groupId>
    <artifactId>spring-security-config</artifactId>
    <version>5.*.*.RELEASE</version>
</dependency>
- 스프링 프레임워크 MVC의 버전에 의존성을 갖습니다.
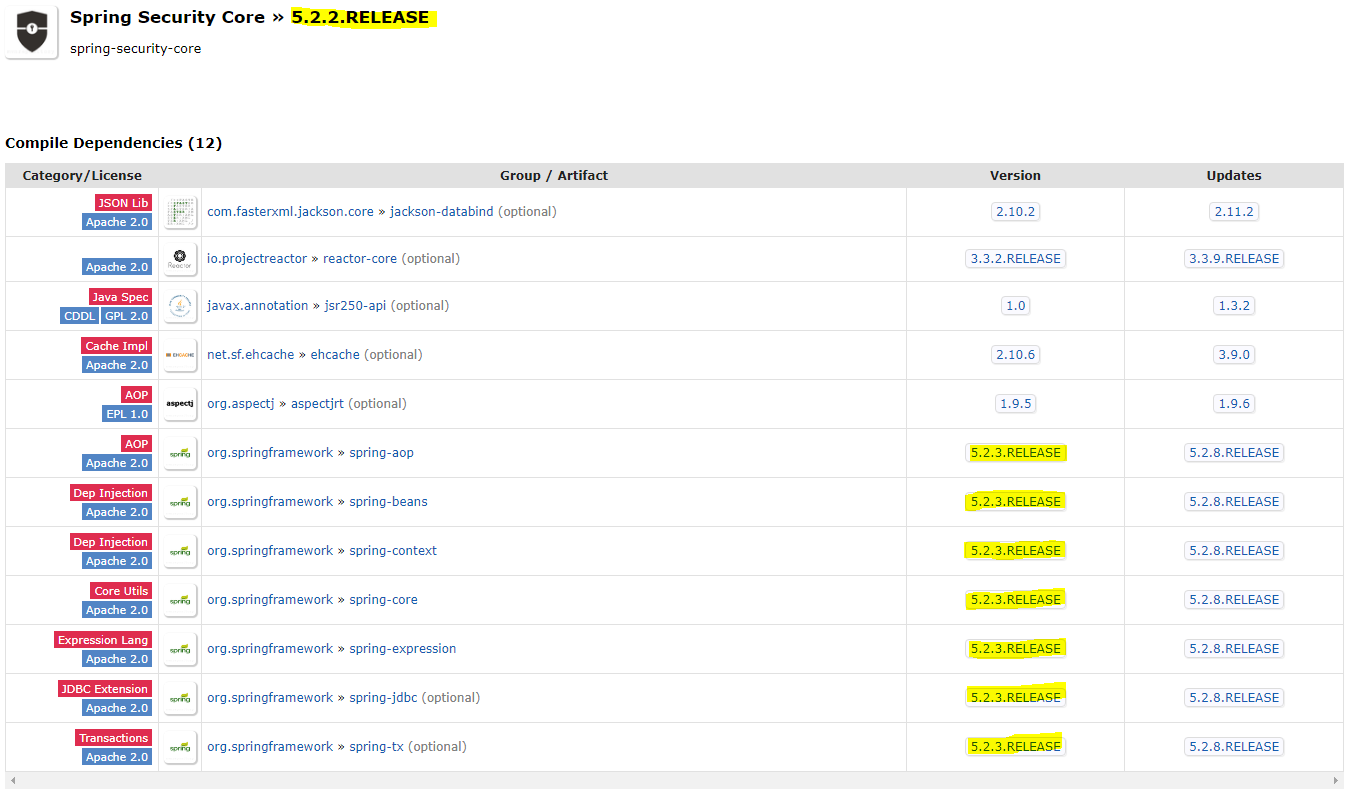
- 지원하는 버전을 확인하고 Maven에 추가해주세요.
- 필자는 스프링 프레임워크를 5.2.3 버전을 사용하기 때문에 스프링 시큐리티는 5.2.2 버전을 사용하였습니다.
- 확인 링크(https://mvnrepository.com/artifact/org.springframework.security/spring-security-core)
(사용하는 스프링 프레임워크보다 한단계 아래의 버전에 들어가 사용하는 MVC 버전이 지원하는지 확인하세요)
2. 기초가 되는 뷰들을 작성해줍시다. (위의 참고 게시물의 연장선)
index.jsp
<%@ page contentType="text/html;charset=UTF-8" language="java" %>
<%@ taglib prefix="c" uri="http://java.sun.com/jsp/jstl/core" %>
<html>
  <head>
    <title>인덱스 페이지</title>
  </head>
  <body>
    <img src="/img/test.jpg" alt="img" style="width: 50vw"><br><br>
    <c:if test="${pageContext.request.userPrincipal.name != null}">
      <button onclick="location.href='/logout'">로그아웃</button>
    </c:if>
    <c:if test="${pageContext.request.userPrincipal.name == null}">
      <button onclick="location.href='/login'">로그인</button>
    </c:if>
    <button type="reset"  onclick="location.href='/filterTest'">UTF-8 필터 테스트</button>
    <button onclick="location.href='/admin'">관리자 페이지</button>
  </body>
</html>
- 로그인 정보를 확인하기 위해 지시자를 사용합니다.
<%@ taglib prefix="c" uri="http://java.sun.com/jsp/jstl/core" %>- 지시자를 이용하여 요청 주체의 name이 존재한다면 로그아웃 버튼을, 존재하지 않는다면 로그인 버튼을 출력합니다.
<c:if test="${pageContext.request.userPrincipal.name != null}">
	<button onclick="location.href='/logout'">로그아웃</button>
</c:if>
<c:if test="${pageContext.request.userPrincipal.name == null}">
	<button onclick="location.href='/login'">로그인</button>
</c:if>
filterTest.jsp와 admin.jsp 파일도 비슷한 형식으로 작성해줍니다.
3. 컨트롤러를 작성해줍시다.
HomeController.java
package com.project;

import org.springframework.stereotype.Controller;
import org.springframework.ui.Model;
import org.springframework.web.bind.annotation.RequestMapping;

@Controller
public class HomeController {

    @RequestMapping(value = "/")
    public String index() {

        return "index";
    }

    @RequestMapping(value = "/admin")
    public String admin() {

        return "admin";
    }

    @RequestMapping(value = "/filterTest")
    public String filterTest(Model model) {
        model.addAttribute("korean", "한글");
        model.addAttribute("ABCD", "ABCD");

        return "filterTest";
    }
}
- 인덱스 페이지와 관리자용 페이지, 그리고 로그인한 사용자라면 접근이 가능한 필터 테스트 페이지를 매핑시켜줍니다.
4. 본격적인 스프링 시큐리티 적용
<filter>
    <filter-name>springSecurityFilterChain</filter-name>
    <filter-class>org.springframework.web.filter.DelegatingFilterProxy</filter-class>
</filter>
<filter-mapping>
    <filter-name>springSecurityFilterChain</filter-name>
    <url-pattern>/*</url-pattern>
</filter-mapping>
XML에 기반한 설정을 한다면 위의 코드와 같이 web.xml에 필터를 등록해주겠지만 우리는 WebApplicationInitializer을 이용해 자바 기반의 설정을 하려 하기 때문에 아래의 코드를 생성해줍시다.
(패키지, 클래스명은 원하는 대로 설정하시면 됩니다.)
SecurityWebApplicationInitializer.java
package com.project.security;

import org.springframework.security.web.context.AbstractSecurityWebApplicationInitializer;

public class SecurityWebApplicationInitializer extends AbstractSecurityWebApplicationInitializer {
    public SecurityWebApplicationInitializer() {
        super(SecurityConfig.class);
    }
}
- 위의 자바 클래스가 web.xml에 필터를 등록한 것과 같은 효과를 지닙니다.
- 스프링 시큐리티 필터는 애플리케이션의 보안 요청을 가로채는 필터입니다. 그래서 애플리케이션이 실행될 때 로딩을 해주어야 하기 때문에 web.xml에 등록하거나 위의 자바 클래스와 같은 코드를 작성하여 요청을 가로채게 됩니다.
- 자바 코드에서 'SecurityWebApplicationinitializer'클래스는 슈퍼 생성자에게 SecurityConfig.class를 전달하게 됩니다.
SecurityConfig는 아래에서 작성하게 되는데 이는 스프링 시큐리티가 SecurityConfig에서 작성된 설정을 토대로 작동한다는 것을 뜻합니다.
5. 스프링 시큐리티 설정 클래스 작성
필자는 'SecurityWebApplicationInitializer'를 작성했던 패키지인 'com.project.security'에 설정 클래스를 작성하였습니다.
(패키지, 클래스명은 원하는 대로 설정하시면 됩니다.)
SecurityConfig.java
package com.project.security;

import org.springframework.beans.factory.annotation.Autowired;
import org.springframework.context.annotation.ComponentScan;
import org.springframework.context.annotation.Configuration;
import org.springframework.security.config.annotation.authentication.builders.AuthenticationManagerBuilder;
import org.springframework.security.config.annotation.web.builders.HttpSecurity;
import org.springframework.security.config.annotation.web.builders.WebSecurity;
import org.springframework.security.config.annotation.web.configuration.EnableWebSecurity;
import org.springframework.security.config.annotation.web.configuration.WebSecurityConfigurerAdapter;

@Configuration
@EnableWebSecurity
public class SecurityConfig extends WebSecurityConfigurerAdapter {
    @Override
    protected void configure(HttpSecurity http) throws Exception {
        http.authorizeRequests()
//                .anyRequest().hasRole("USER")
                .antMatchers("/").permitAll()
                .antMatchers("/admin").hasRole("ADMIN")
                .anyRequest().authenticated()
                .and()
                .formLogin()
                .and()
                .logout()
                .logoutUrl("/logout");
        http.csrf().disable();
    }

    @Override
    protected void configure(AuthenticationManagerBuilder auth) throws Exception {
        auth.inMemoryAuthentication()
                .withUser("test").password("{noop}1234").roles("USER");
        auth.inMemoryAuthentication()
                .withUser("admin").password("{noop}admin").roles("ADMIN");
    }
}
- @Configuration 어노테이션을 이용하여 Config 클래스임을 확인시켜줍니다.
- @EnableWebSecurity 어노테이션을 이용하여 스프링 시큐리티를 적용시켜줍니다. (필수)
- WebSecurityConfigurerAdapter를 상속받아 사용합니다. 스프링 시큐리티 설정에 관한 메소드들이 정의되어 있습니다.
- 상속받은 클래스에서 configure메소드를 오버라이드 해줍니다.
- 매개변수로 HttpSecurity, AuthenticationManagerBuilder를 받는 메소드만 오버라이드 해줍니다.
- (기본 세팅이기때문에 위의 두 메소드만을 사용합니다. 다른 메소드는 이후 게시물에서 설명하겠습니다.)
- 먼저 매개변수로 HttpSecurity를 받는 메소드는 스프링 시큐리티의 보안관련 설정을 하는 메소드입니다.
- http.authrizeRequest()를 불러오고 그 뒤에서 권한 설정을 진행하는데 .antMatchers는 요청 URL에 대한 설정입니다.
- .antMatchers("/").permitAll은 주체가 "domain.com/"으로 접속시 모든 주체에게 요청을 허용한다는 것을 뜻합니다
- .hasRole은 뒤의 스트링 값(권한)을 가진 사용자만을 허용하는 것을 뜻하는데 위의 코드에서는 "ADMIN" 권한을 가진 주체만이 요청에 대한 응답을 하라는 뜻을 가집니다.
- .anyRequest().authenticated() 어떠한 리퀘스트던지 허용된 주체만 접속을 허가합니다. 위에서 인덱스페이지("/")는 모든 사용자에게 허용했기 때문에 나머지 페이지인 /filterTest가 여기에 걸립니다.
hasRole() , hasAnyRole() 특정 권한을 가지는 주체만 접근 가능합니다. hasAuthority() , hasAnyAuthority() 특정 권한을 가지는 주체만 접근 가능합니다. hasIpAddress() 특정 IP를 자기는 주체만 접근 가능합니다. permitAll() , denyAll() 접근을 전부 허용하거나 제한합니다. rememberMe() 리멤버 기능을 통해 로그인한 주체만 접근 가능합니다. anonymous() 인증되지 않은 주체가 접근 가능합니다. authenticated() 인증된 주체만 접근 가능합니다. - .formLogin()은 로그인하는 페이지를 설정할 수 있는데 기본은 (/login)요청이며 스프링 시큐리티가 기본적으로 제공하는 로그인 폼이 존재하기 때문에 당장 구현할 필요는 없습니다.
- logout()은 로그아웃 기능을 설정합니다. 위의 코드처럼 .logoutUrl("/logout") 구문을 쓰지 않아도 자동적으로 스프링 시큐리티가 (/logout) 요청을 구현해주기 때문에 당장은 구현할 필요가 없습니다.
- http.csrf().disable()은 csrf공격에 대한 스프링 시큐리티 보안을 해제하는 구문입니다. 테스트 개발을 하는 중에는 필요하지 않고 해당 기능을 사용하기 위해서는 csrf 토큰이라는 것을 보내줘야 정상작동하므로 해당 기능을 비활성화합니다.
csrf기능을 사용하는 방법을 모르는 상태에서 비활성화 하지 않으면 해당 작업을 위한 토큰이 존재하지 않는다고 403에러를 뿜어내기때문에 비활성화 해줍시다.
이제 'AuthenticationManagerBuilder'를 매개변수로 받는 configure 메소드를 봅시다.
시인성을 위해 여기서 메소드만 다시 보여드립니다.
@Override
protected void configure(AuthenticationManagerBuilder auth) throws Exception {
	auth.inMemoryAuthentication()
		.withUser("test").password("{noop}1234").roles("USER");
	auth.inMemoryAuthentication()
		.withUser("admin").password("{noop}admin").roles("ADMIN");
}
- In-Memory Authentication이라고 해서 애플리케이션 내에 하드코딩으로 사용자의 아이디와 패스워드를 저장하는 방식입니다.
- 원래는 JPA, Hibernate같은 ORM이나 Mybatis같은 Mapper를 통해 데이터베이스에서 사용자의 정보를 가져와 사용자가 로그인폼(위의 코드에선 "/login")에서 입력한 정보를 암호화하고 비교하여야 하지만 이번 글에서는 기본적인 세팅만을 다루기 때문에 사용자의 정보를 InMemory를 이용해 하드코딩합니다. (실무에서는 당연히 사용 불가능합니다.)
- 스프링 시큐리티의 버전이 올라가면서 password에 일반적인 스트링 값을 넣을 수 없도록 변경되었습니다.
- 그래서 '{'와 '}'사이에 암호화 인코더를 적어줘야 하는데 그중 암호화 하지 않았을 때는 {noop}을 사용하도록 합니다.
- 위의 설명을 토대로 보면 .withUser()를 통해 유저의 아이디를 설정합니다.
- password()를 통해 비밀번호를 설정합니다.
- .roles()통해 부여할 권한을 설정합니다.
- /admin으로 접속했을 때 위의 configure 메소드에서 "ADMIN"권한을 가진( .hasRole("ADMIN") ) 주체만이 접근할 수 있도록 하는데 이것을 설정하는 것입니다.
6. 실행해봅시다.
("/")요청
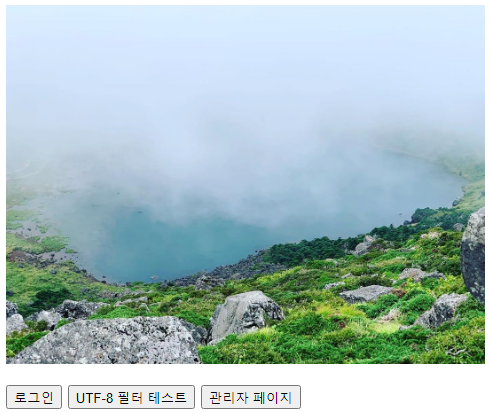
- .antMatchers("/").permitAll()를 통해 인덱스 페이지는 모든 주체에게 허용했음으로 정상 표시됩니다.
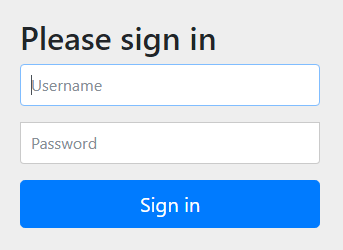
관리자 페이지 접속 ("/admin")
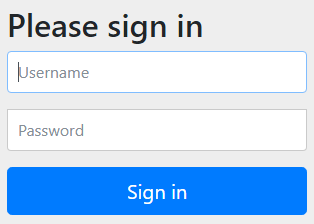
- 관리자 페이지를 접속하면 configure메소드에서 설정했던 대로 주체를 확인하는 로그인 폼으로 연결됩니다.
"ADMIN" Role을 가진 계정으로 접속시 :
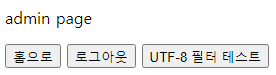
- 관리자 페이지가 정상적으로 보입니다.
- jsp파일에서 설정했던 대로 로그인을 했기 때문에 로그아웃 버튼이 보입니다.
"ADMIN" Role을 가지지 않은, ("USER" Role을 가진) 사용자로 로그인(요청)시
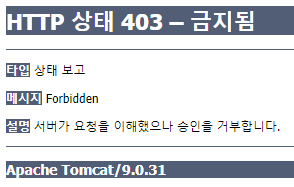
- 서버가 요청은 이해했다고 서버의 로직 문제는 아니라고 친절하게 알려줍니다.
로그인을 하고 인덱스페이지 접속

- 로그인 버튼 대신 로그아웃 버튼이 정상적으로 확인됩니다.
로그인을 하고 필터 테스트 페이지 접속
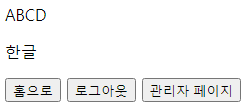
어떠한 Role을 가졌던지 로그인을 한 주체라면 페이지에 접속할 수 있습니다. (ADMIN, USER 모두)
여기까지가 스프링 시큐리티의 기본적인 설정이었습니다.
다음 게시물에서는 스프링 시큐리티를 커스텀 하는 방법들에 대해 자세하게 다뤄보겠습니다.
(암호화, DB연동, 사용자 정의 로그인폼 등등)
읽어주셔서 감사합니다.
<무단 전재 - 재배포를 금지합니다>
'Back-end > Spring Security' 카테고리의 다른 글
[A-Z]스프링 시큐리티 - 1. 기본 정보 (0) 2020.08.29